Article
How to prepare a Canva file for print
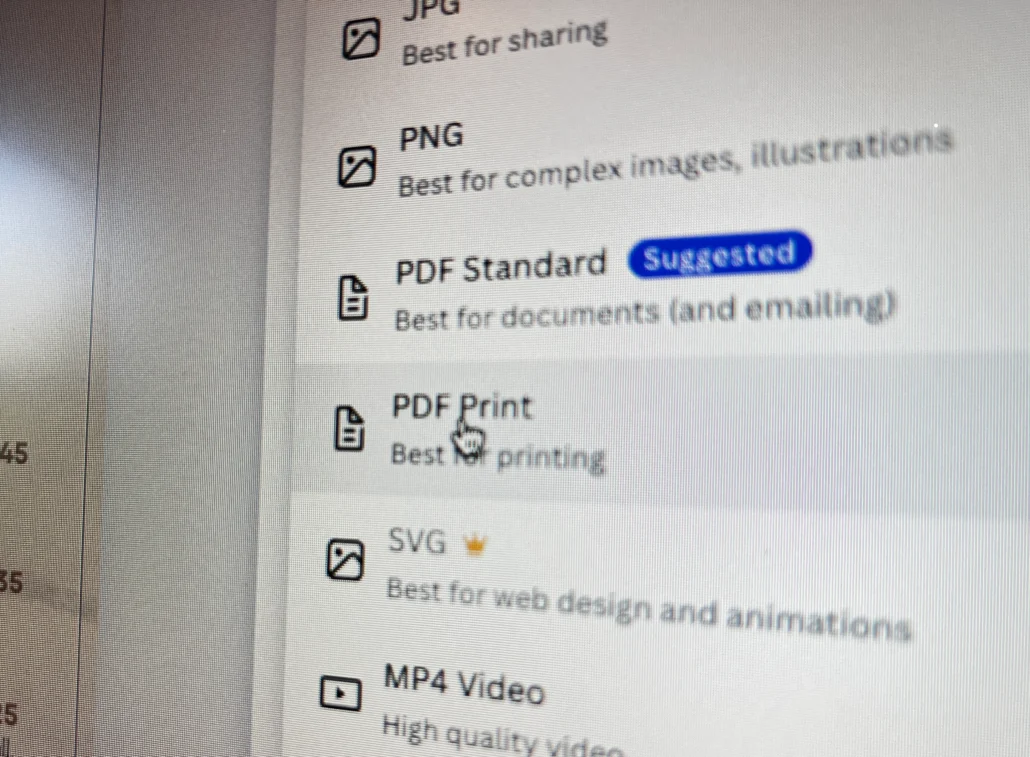
To prepare a Canva design for print, start with the finished size, extend backgrounds into the bleed and keep text clear of the edges. Export as PDF Print, then open the downloaded file and check every page before sending it.
A design can look right on screen but still have problems in print. Small web images, missing bleed and text near a cutting edge are common causes of delays. These checks help you find them before production.
Choose what you are printing
Start with the product, then use the matching Canva guidance to set up the file.
- Brochures and booklets — compare stapled and perfect-bound options.
- Flyers and folded leaflets — choose flat or folded, then match the template.
- Posters — compare paper, PVC and the 4-sheet quote route.
1. Set the finished size before designing
Choose the size of the trimmed product, not the size of a social media graphic. A5, A4, DL and large posters have different proportions. Use a custom size if the preset you need is not available, and check the product specification before you start.
You can compare A5 flyers, A4 flyers, A4 folded leaflets, A1 posters and A0 posters. For booklets, use the stitched booklet artwork guide as well.
2. Extend backgrounds into the bleed
Bleed is artwork outside the finished cutting edge. It allows for small cutting variations without leaving a white strip along the edge. Many of our products need 3mm bleed, but the product template takes precedence.
Turn on Canva’s print bleed view and extend backgrounds and edge-to-edge images into that area. Keep logos and text inside the finished page. Canva’s bleed setting is fixed, so check the exported PDF against the specification rather than assuming it matches every print product.
3. Leave a safe margin
Keep important text, logos and QR codes at least 5mm inside the trim edge unless the product guide specifies otherwise. Folded work and booklets may need extra space around folds or binding. A generous margin is easier to read and less likely to expose small cutting differences.
4. Check image quality at the intended size
Use original photographs and logo files where possible. Screenshots and images saved from social media can look sharp on a phone but soft on paper. Enlarging a small image does not restore its detail.
If Canva flags an image as low quality, replace it before export. Check QR codes too: they need enough clear space and contrast to scan at the printed size.
5. Export as PDF Print
Choose Share, then Download, and select PDF Print. Include crop marks and bleed when requested by the product specification. Canva groups these in one export option. If the product needs a different setup, send the PDF for advice before approving production.
| Export | When to use it |
|---|---|
| PDF Print | The usual starting point for supplying Canva artwork for professional print. |
| Standard PDF | Useful for sharing a draft, but check it before using it as a production file. |
| JPG or PNG | May suit an image-only job, but is not our first choice for text-heavy layouts. |
6. Allow for colour differences
Screens emit light; paper reflects it. Bright RGB colours may change when converted to CMYK for print. The paper and finish also affect the result. If a brand colour or repeat order needs close matching, tell us before production so we can discuss a suitable proof or sample.
Our CMYK and colour guide explains what to check and why a screen preview is not a colour guarantee.
7. Open and check the downloaded PDF
Review the exported file, not just the Canva design. Check spelling, contact details, images and page order. Look for unexpected borders, missing elements and text near the trim edge. Test every QR code and confirm the file contains the pages you intend to print.
Before you send the file
- Confirm the finished size and orientation.
- Check bleed and keep important content inside the safe area.
- Replace low-quality images and check your logos.
- Export as PDF Print using the product’s artwork requirements.
- Open the PDF and review every page, including blank pages.
Use the print-ready PDF checklist for a final check. If you have already ordered, follow your order’s artwork upload instructions. Our artwork upload page explains the available routes.
Questions about Canva print files
Which download setting should I use?
PDF Print is the usual choice. Check the finished file against the product specification before sending it.
Should I include crop marks and bleed?
Follow the product specification. For edge-to-edge designs, the file needs the correct bleed; crop marks are not a substitute for it.
Can Aspect Printing check my file?
Yes. Send us the PDF with your brief, including the product, finished size, quantity and deadline. We can advise on the file setup before it goes to print.
For current editor controls, see Canva’s guidance on margins, bleed and crop marks.